

As a seasoned supplier of block board plywood, I've witnessed firsthand the transformative power of veneer application in enhancing the aesthetic and functional value of our products. Veneer, a thin layer of wood, adds a touch of elegance and sophistication to block board plywood, making it a popular choice for a wide range of applications, from furniture making to interior design. In this blog post, I'll share my expertise on how to apply veneer on block board plywood, providing you with a step-by-step guide and valuable tips to ensure a successful project.
Understanding Veneer and Block Board Plywood
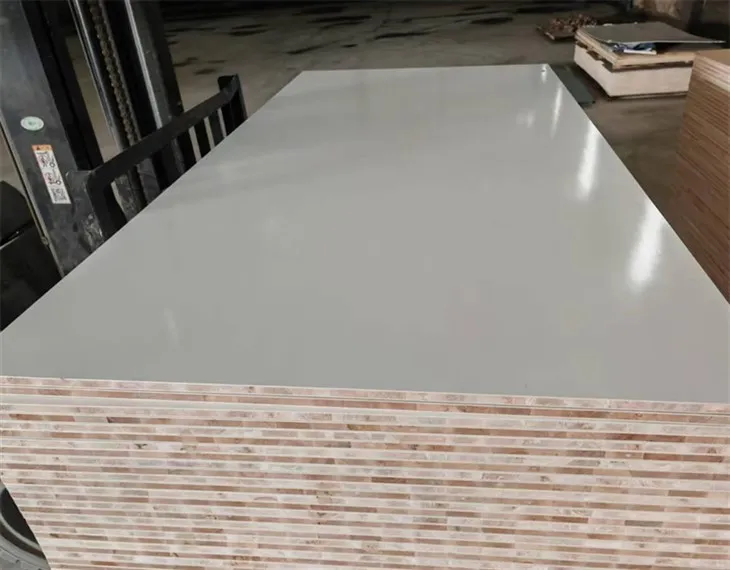
Before we dive into the application process, let's take a moment to understand the materials involved. Veneer is typically sliced or peeled from high-quality logs, resulting in a thin sheet of wood that showcases the natural grain and beauty of the wood species. Block board plywood, on the other hand, consists of a core made up of parallel strips of wood, sandwiched between two outer layers of plywood. This construction provides strength, stability, and durability, making it an ideal substrate for veneer application.
Choosing the Right Veneer and Block Board Plywood
The first step in applying veneer on block board plywood is to choose the right materials. When selecting veneer, consider the wood species, grain pattern, and color to ensure it complements your project's design aesthetic. Popular wood species for veneer include oak, maple, walnut, and cherry, each offering unique characteristics and visual appeal.
When choosing block board plywood, opt for a high-quality product that is flat, smooth, and free of defects. Look for plywood with a consistent thickness and a strong core to provide a stable base for the veneer. As a block board plywood supplier, I recommend our Pine Sandwich Block Board, Poplar Sandwich Block Board, and Melamine Faced Back Block Board for their excellent quality and performance.
Preparing the Block Board Plywood
Once you've selected the veneer and block board plywood, it's time to prepare the surface for veneer application. Start by sanding the block board plywood to create a smooth, even surface. Use a fine-grit sandpaper, such as 120 or 150 grit, to avoid scratching the wood. Sand in the direction of the grain to ensure a consistent finish.
After sanding, clean the surface of the block board plywood to remove any dust or debris. You can use a vacuum cleaner or a tack cloth to wipe away the dust. Make sure the surface is completely dry before proceeding with the veneer application.
Applying the Adhesive
The next step is to apply the adhesive to the block board plywood. There are several types of adhesives available for veneer application, including contact cement, hide glue, and epoxy. Contact cement is a popular choice because it provides a strong bond and dries quickly.
To apply the contact cement, use a brush or a roller to evenly coat both the surface of the block board plywood and the back of the veneer. Make sure to apply a thin, even layer of adhesive to avoid excess glue seeping through the veneer. Allow the adhesive to dry for the recommended time, usually 15 to 30 minutes, until it becomes tacky to the touch.
Laying the Veneer
Once the adhesive is dry and tacky, it's time to lay the veneer on the block board plywood. Carefully position the veneer on the surface of the plywood, aligning the edges and grain pattern. Start at one end of the plywood and gradually lay the veneer down, using a roller or a veneer press to smooth out any air bubbles or wrinkles.
As you lay the veneer, make sure to apply even pressure to ensure a strong bond between the veneer and the plywood. Use a veneer hammer or a rubber mallet to gently tap the veneer into place, paying special attention to the edges and corners.
Trimming the Veneer
After laying the veneer, use a sharp utility knife or a veneer saw to trim the excess veneer from the edges of the plywood. Make sure to cut along the edge of the plywood, following the contour of the surface. Use a straightedge or a guide to ensure a straight, clean cut.

Finishing the Veneer
Once the veneer is trimmed, it's time to finish the surface to protect the wood and enhance its appearance. You can apply a clear finish, such as varnish, lacquer, or oil, to the veneer to provide a durable, protective coating. Make sure to follow the manufacturer's instructions when applying the finish, and allow sufficient drying time between coats.
Alternatively, you can stain the veneer to change its color or enhance the natural grain pattern. Choose a stain that is compatible with the wood species and the finish you plan to use. Apply the stain using a brush or a cloth, following the grain of the wood. Allow the stain to dry for the recommended time before applying the finish.
Tips for a Successful Veneer Application
- Work in a clean, well-ventilated area: Veneer application can generate dust and fumes, so it's important to work in a clean, well-ventilated area to avoid inhaling harmful particles.
- Use the right tools: Invest in high-quality tools, such as a veneer press, a veneer hammer, and a sharp utility knife, to ensure a professional-looking finish.
- Take your time: Veneer application requires patience and precision. Take your time to align the veneer, smooth out the air bubbles, and trim the edges to ensure a perfect fit.
- Practice on a scrap piece of wood: If you're new to veneer application, it's a good idea to practice on a scrap piece of wood before working on your project. This will help you get familiar with the process and gain confidence in your skills.
Conclusion
Applying veneer on block board plywood is a rewarding project that can transform the look and feel of your furniture or interior design. By following the steps outlined in this blog post and using the right materials and tools, you can achieve a professional-looking finish that will last for years to come.
As a block board plywood supplier, I'm committed to providing high-quality products and excellent customer service. If you have any questions or need assistance with your veneer application project, please don't hesitate to contact me. I'm here to help you every step of the way.
References
- Woodworkers Journal. (n.d.). Veneer Application Techniques. Retrieved from [Website URL]
- Fine Woodworking. (n.d.). How to Apply Veneer. Retrieved from [Website URL]
- Popular Woodworking. (n.d.). Veneer Basics: A Beginner's Guide. Retrieved from [Website URL]


